After rough cutting the profile it’s time to finish it up smooth so that I can get a “feel” for how it fits in the hand without scales. First I used a 60 grit 2 x 72 belt. The photo shows the distinctive orange color that the Norton Blaze belts are known for. It was pretty easy, with one exception. The finger choil area.
The smaller 1 x 30 belt sander. Although this sander seems to be really cheap, it did do a good job of roughing out some of the portaband saw cuts. However, I didn’t have a way to get into the finger choil area without taking more material off than needed along the lower part of the handle. I will also have to modify this belt sander as I could really use the rounded section of belt around the upper wheel. This would be useful for getting into curved areas that the Grizzly cannot reach but it also means removing a safety feature for the sander, in this case – a guard.
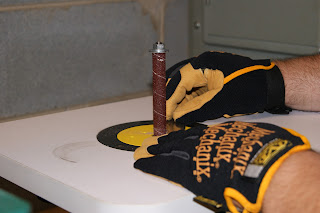
I tried switching to my Grizzly oscillating drum sander. This method could be much easier, but the heaviest grit I had available was 180.Not enough to really make a difference in finishing up the handle tang. I would need either a heavier grit drum or a different method.
Here one can see that I’ve mounted the template between some 2 x 4 pieces leftover from my Wen 10” Sliding Compound Mitre Saw table. The wood blocks allow me to use the vise to hold the blank without marring the surface. This allowed me to access the finger choil area and the rest of the bottom of the handle with a half-round bastard file. Not the easiest method, but it gave me a lot of control over the material removal process. Plus there were some “high spots” along the lower handle area from grinding where the belt couldn’t reach. This took longer than expected but the final result was a smooth finger choil area and a smooth lower handle section. I’ll post in a later article how I finished this with a method called draw-filing.
The file I used to finish up the handle area. It produced a bit of a rough texture but with the smaller jeweler’s file similar to this one I was able to improve the finish.
The final template. I’ve since drilled a hole at the end corner of the handle for hanging on pegboard. This may turn out to be the same location for a lanyard hole. We’ll see. I didn’t want to add pin holes just yet as I may decide to use a different size pin in the future or I may even decide to use screw construction to mount the scales instead of pins. We’ll see.
The template and how it fits in my hand. The actual blade will probably include some jimping along the spine of the blade near the handle for greater control. Also, the blade will be 5/32" thick as opposed to the template which is 3/32" thick.
So what have I learned so far? Well, I’ve learned that despite the headache the Grizzly belt sander gave me, it works great. I especially love the Norton Blaze 60 grit 2 x 72 sanding belts. Those belts cut right through my 1095 steel like butter. I’ve learned to give a bit of extra material for those belts. Believe me, they won’t have any problems cutting extra material down. For future reference, I’ll remind myself to allow the belt to do most of the work for me and not try so much at cutting the blank as close as possible to the design with the portaband saw. I’ve also realized that in order to reach the gully of the finger choil, I will probably need to invest into more abrasive grit belts for the 1 x 30 as well as more abrasive sanding drums. There’s nothing wrong with switching over to a more time-honored method of material removal like hand filing, but if I wish to complete the profiling of the blades in a shorter amount of time, it would pay to have power tools and accessories that can help me accomplish this. Looks like I get to go shopping for more shop stuff!
Up next – a short production run!


No comments:
Post a Comment