Sunday, November 25, 2012

The Amateur Crafter: Project 3.0 - Chillin' & Drillin'

One of the goals about this project, and the purpose of equipping the shop, was to learn about the processes into making a knife. By that I mean a custom knife. Learning about these processes allows a deeper understanding towards manufacturing the product and gives insight into areas that need improvement, in particular processes that produces 'hit-and-miss' results. The process where I am (or rather was) at in my knives is one of those steps that didn't produce the expected result. I'll explain.

To lighten the weight of my knives I intended to drill out some holes along the handle. This is a common practice by all professional knifemakers. I knew that removing material from the blade when I grind it would make the knife heavier in the handle. I want these knives to be balanced more at the choil, just behind the back of the blade. 

To do this I first laid out the template and put four 3/8 inch holes along the handle area. While I was at it, I went ahead and drilled out the holes for the 1/8 inch handle pins. Since the template was thin material (1084 steel I think) this was pretty easy to do. Also, I did this at the shop at work on a large vertical knee mill. This provides a considerable amount of rigidity. However, my knives are 5/32 inch thick and made of 1095 steel. And I'm trying to do this process almost entirely in my shop. This means I'll drill out the 3/8 holes on my little bench-top drill press. First I marked the location of each hole.


Next I center punched each location with my automatic punch. Then I simply lined up each punch mark with the tip of my drill on my drill press. 


This also gave me an opportunity to test out my drill press clamps (sometimes called "toe clamps").

Despite the blade having a secure, rigid mount the holes didn't come out good at all. Compared to a large milling machine, my Central Machinery drill press just doesn't have the same structural stability - which means that the holes turned out to be more of a Reuleaux Triangle in shape rather than a hole. Note this diagram retrieved from Tanya Khovanova’s Math Blog


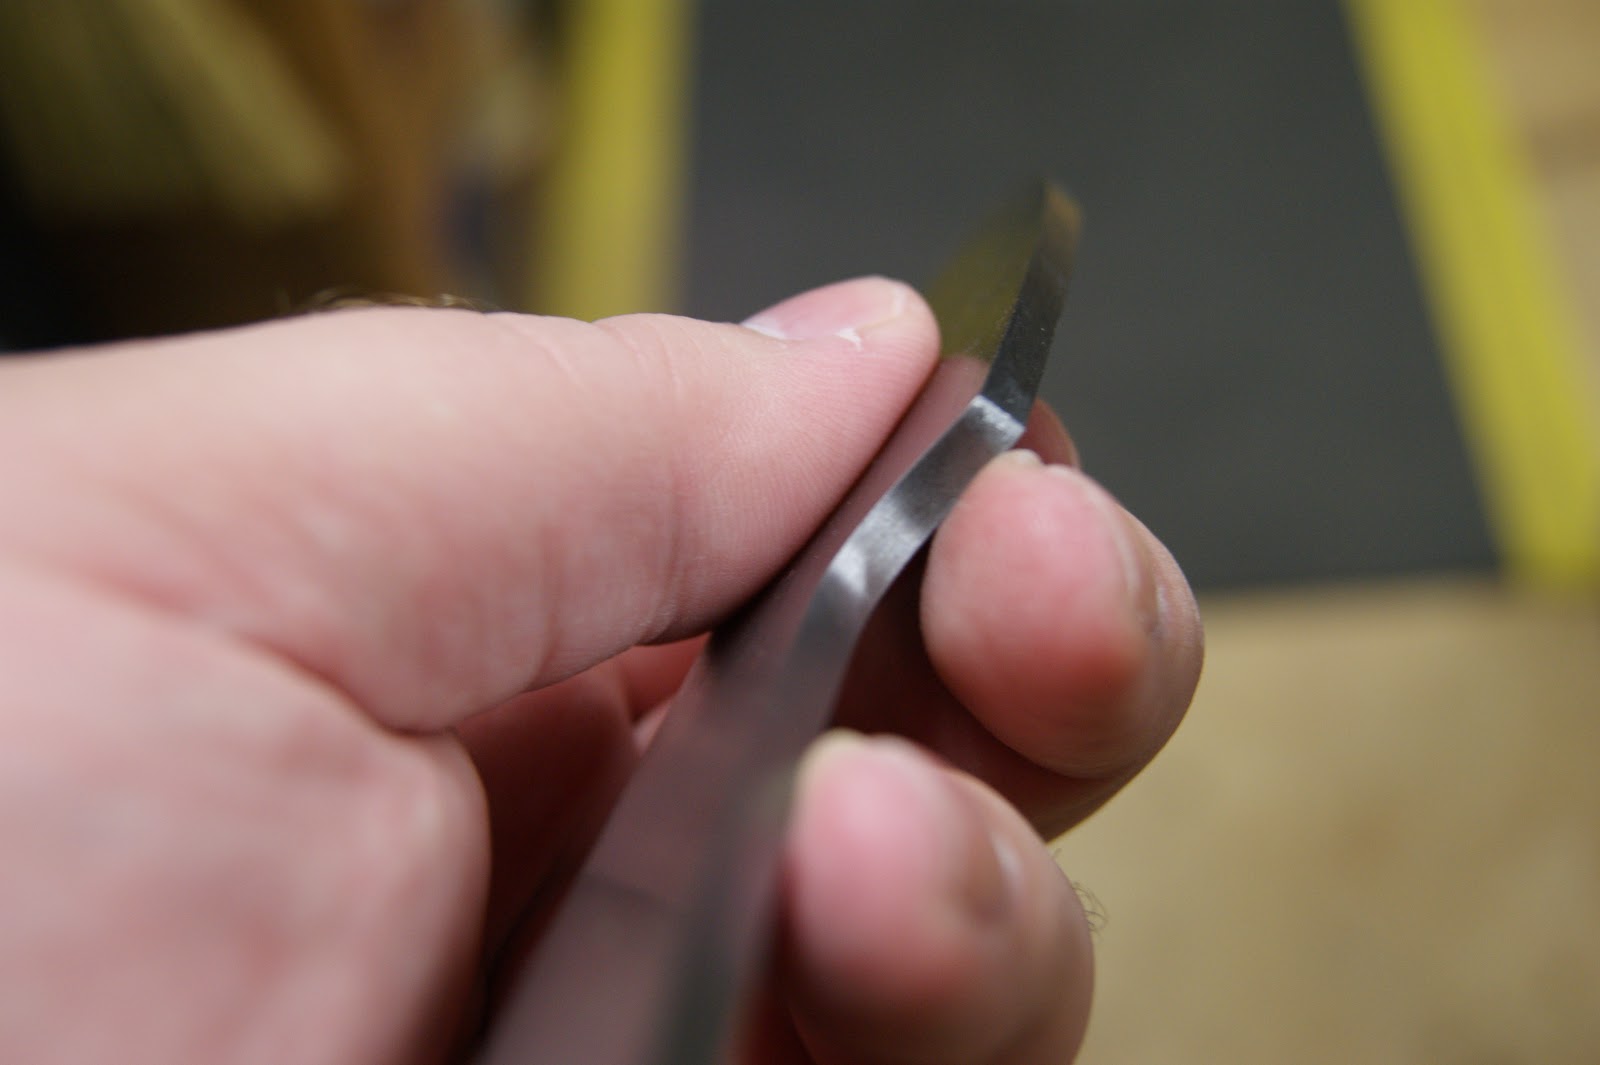
From the image, the right shape shows a "rounded" triangle. This is the type of hole that was produced on my drill press albeit more exaggerated in the image. Note the photo.


It may not be as visible but the holes are not round much at all, plus the walls of the holes are very rough. This might seem trivial especially since the holes are along the handle which will be covered by scales anyway. And it's true, along the handle those 3/8 holes won't matter much at all. However, the holes for the brass handle pins might not work with the brass rod. Also, as I am wanting to work towards the creation of my own custom folder knives, I will need to resolve this problem if I want the pieces to fit together properly on future folders. This means that I need accuracy through rigidity. 

Since my drill press can't really provide me with much, I needed to improvise. This is something I try to teach my students as much as possible - learn to improvise. To complete a job, one may not always have access to high end stout machines and high quality tools, yet the job must still get done. Being able to improvise and work around the limitations of a shop is one of the best skills any technician could develop. I decided to try additional tools. 

Enter the center drill, sometimes called a combination drill/countersink. Note the following image from Harvey Tools.


Note also the type of hole a tool like that will leave. The cross section shows a beveled hole (countersink) leading into a small cylindrical hole. Doing this first before drilling out the 3/8 holes will provide a better "center" for the drill to start on. Additionally, I decided to purchase a "screw machine" drill rather than continue to use my jobber length drill. A screw machine drill is much shorter and less likely to "walk" during use. Also center drilling first then immediately drilling out the hole afterwards, without moving the work piece, will improve my accuracy.

Because I didn't have these tools available, I had to purchase them online. 


This is a #2 x 4 inch center drill.


Here one can see the screw machine drill next to the jobber length drill. The shorter length gives greater rigidity.


Once I got the tools in I started back on my process. Last time I drilled these I had them marked with just a permanent marker. That didn't hold up to normal wear so I decided on something stronger.


The steel dye (called Dykem) can provide a durable coating on the work pieces that'll withstand oil, coolant, and water. This also allows me to scribe the location of the holes.


This allowed me to simply line up my center drill in the middle of each scribed circle. No center punch needed.


I also added an extra drilling operation before I drilled the final size. This is known as pilot drilling. Using a smaller sized drill than 3/8 I drilled out the hole, which puts let burden on the larger drill bit due to less material removal. On larger machines, this is not an issue. But my small drill press doesn't have the same horsepower as the larger machines so my larger drill bit has to work harder to remove material. Putting a smaller hole there first means that the drill doesn't have to work as hard now to produce a hole.


A good result. Note the "cushions" I used on the table clamps to protect the blade from scratches by the "toes" of each clamp.


The final result. The steel dye is still visible on 4 of the blades


The blades are now tip heavy and will probably balance back at the choil once the grind has been completed. Speaking of knife grinding, the following photo shows the angle iron stock I plan on using to make my grinding fixture for my knives. I've taken the time to file, sand, and scotch-brite each side to a good flat surface.


This is how I plan to mount the blade onto the fixture. I'll need a bit of planning to work it out. That'll come in the next article. 

Despite this particularly long delay happening, it was not only expected but needed. I had to figure out if my drill press would be capable of producing the result I needed it to. I do plan to purchase a larger bench top drill press, possibly even a floor model if necessary. But I wanted to wait until tax time to do it because that'll be a substantial purchase like the Grizzly. At least, if I purchase one with any structural integrity I'll have to pay much more than just the price of a cheap-ee Harbor Freight model.  Thankfully, the tooling worked out just fine. This method does add more to the time to produce it. Because I'm concerned with accuracy, I must center drill, then remove the combination drill/countersink, then mount the pilot drill, drill out the pilot hole, then remove the pilot drill, then mount the 3/8 inch screw machine drill, drill out the 3/8 hole, then finally unclamp the work piece to move to the next hole and repeat the steps. I cannot center drill each hole on every work piece while the tool is mounted and then remove it for the next tool, not if I wish to maintain any degree of accuracy. To get an idea of this, imagine center drilling, then drilling, then drilling again 4 holes for 5 separate knives and each time you drill or center drill once, you must stop what you are doing and then switch tools for the next operation. It really adds up to a lot of time. Fortunately, the result is exactly what I wanted. After grinding all that's left to do is heat treat and put the edge to each blade and start working on the final product which will be mounting some material on each side of the handle for the scales. I can now see a final result in sight!

Up next, creating the grinding fixture!

Sunday, October 21, 2012

The Amateur Crafter: Get A Grip!


Been a bit under the weather lately, most likely from either the recent flu shot or from some of the students showing up sick at school. So, not much shop work going on this week except for just drilling some holes.

But it occurred to me from posting my last article that it might be a good idea to inform readers of the materials, terms, etc. I’m using in my knife making particularly if some of the readers don’t have any experience with knife making or collecting. So I thought that I’d write a basic article on that. 

Micarta. Micarta is actually a brand name that’s now being used as a term to describe layered epoxy resin block. The layering comes from laying materials such as paper, canvas, linen, or even denim in strips with a coating of epoxy resin in between each layer. The material used really isn’t too important, and it can be quite flimsy. 


But what matters is that the material with the epoxy in between is pressed together and allowed to stay like that while the resin is hardening. This creates a very strong but easily worked block suitable for handle (scale) material. Check out some of the photos retrieved from various knife maker supply websites or other knife maker web galleries. 

The following micarta photos were retrieved from canmanstan.com.


 Black Paper Micarta


Black Linen Micarta


Various Canvas Micarta. Retrieved from fowlweathercustomcalls.com.


Denim Micarta. Photo retrieved from fendleyknives.com.


From the photos, one can see the various textures and patterns left from grinding away the micarta. The micarta is what I’ve used so far on my knives, simply because it was provided for me as part of the knife making courses. Micarta can be made at home, but the process is fairly messy and unless one is purchasing materials in bulk, not very cost effective either. It’s simply cheaper and easier to purchase micarta rather than to make it. But I’ve seen a lot of hobbyist/amateur videos online to know that some people just want to make their own, which I can understand. I’ve no plans to try this out, but who knows? Other types of handle material include bone, G10, wood, or plastics such as synthetic shell material. 


G10 is a fiberglass laminate similar in construction to micarta. Each fiberglass layer has a resin layer and the entire material is compressed and baked, thus hardening the material so it can be quite a burden on cutting tools. But like micarta, it is very lightweight and durable. This is usually ideal for more tactical purpose tools and G10 can be “textured” to provide more gripping surfaces. Photo retrieved from usaknifemaker.com.

When working with either G10 or micarta (and maybe carbon fiber as well) it’s important that a dust mask is used to help prevent the dust and fibers from entering the lungs. This can cause serious health risks both short and long term. And the dust filters must be for particulates, not vapors.


Of all of the synthetic handle materials available, one type that will add a bit more appeal to a blade is carbon fiber. It’s made of small strands of carbon weaved tightly together to form a pattern. The main appeal to this material is its ability to reflect light, making the pattern more visible. Making carbon fiber is a labor-intensive process and usually costs more to purchase, adding more costs to a blade. Retrieved from canmanstan.com


Bone handle photo retrieved from knives.net.

Bone can turn nearly any blade into a gentlemen’s knife, an antique-looking skinner, or even a work of art. I’ve not worked with bone before but from what I can tell most types of bone can either polish well or remain in a natural state. 


Wood handled stone inlay knife retrieved from macsindianjewelry.com.
Wood is a readily available source for scale materials but it’s important to make sure that the scales are stabilized. And further embellishment such as this stone inlay can add much more appeal to the knife.


And of course another major appeal to a knife with wooden scales are the burl scales. A burl is a section of a tree where the grain pattern has grown in an irregular shape. This can be caused by an injury earlier in the tree’s life, a virus or fungus, or an insect infestation. The burl is very dense and resistant to splitting. The result is often highly prized by artists, woodworkers, furniture makers, and knife makers. This adds a considerable cost to the knife as acquiring burl material isn’t easy. Burls (large enough to work with) can be difficult to harvest and its uncommon appearance adds more expense to gathering it. 

Photo retrieved from summersknives.com.


And finally a huge “ooohhh” and “aaahhh” effect one can create for a knife would be a bit of scrimshaw. Technically, this is just bone but I listed this as a separate category because it's bone (or ivory) that's been engraved and had the engraving darkened with pigment. In my opinion very little can outshine a good set of scrimshaw scales, except perhaps polished stone. Check out this knife with a bit of scrimshaw on the handle!


Retrieved from katherineplumer.com,


I would very much love to learn how to create knives with burl scales or embellish them with a bit of stone work or scrimshaw. But I'll have to set aside time to learn how to do that. For now, I think that once my first sets of blades return from heat treat that I’ll stick to G10 or micarta. The material is quick and easy and readily available at a good price.

Saturday, October 13, 2012

The Amateur Crafter: Project 3.0 - Such a Grind

Well the profile of the blades is done. I've also put these to the 4 x 36 belt sander to clean up the sides. So before I start to grind away the primary bevel, I'll need to drill out any holes I need for mounting pins and also any holes that I want to put into the handle to lighten its weight. This may be a critical step in the process but I don't know how well to try and balance the blade. I suspect that with the deep finger choil area that the blade will balance well at that point, regardless of how much material is left on handle.


This little guy is a 2 x 31 hand-held belt sander.

This is how I held the 2 x 31 belt sander. Note the zip-tie on the handle, which is used to keep the trigger button engaged - forcing the sander to remain on constantly.


This seems like it may be dangerous. But keep in mind that this machine has very little power and runs the belts much slower than my bench sander. This means that to finish the choils would require a lot more time to complete than first thought. But it still went much quicker than by hand. Even accidentally bumping my hand/fingers into the belt as it is running did nothing to injure me. From this photo one can also see a bit of water still on the blade to keep it cool.


From the photo, one can see that the choils have been cleaned up to size and have a good finish.

Next is a part of the knifemaking operation that I was experimenting with different methods. The first method I actually started to draw file each knife with a good Nicholson mill file. But I thought that maybe using a 4 x 36 belt sander would grind the sides quicker, even if the finish wasn't that great, I could always clean that up myself.

Cleaning up the sides of the blades. Originally, I used painter's tape and fashioned a sort of "handle" to hold onto while the blade is engaged with the belt sander, similar to how I held the piece in the photo. This work piece is for a modification on the Grizzly. 


But this didn't provide a firm grip of the work piece against the belt sander. So I changed to a heavy-duty magnet. This works okay but the magnet is so strong that it sometimes sticks to the platen of the belt sander. As a rule of thumb, the nicer the finish going into heat treat, the easier it is to reproduce that finish once heat treating is completed. Here in this photo I've used painter's tape to cover the magnet. This helps in cleaning up the shavings removed from the metal.


While this may not seem that important, it is a crucial point in the process. In order to ensure that my holes are drilled perpendicular, and to ensure that each blade grind is even on both sides, each side of the blade must be true flat and parallel to the other side. Without true flatness and parallelism, the blade grind my come out uneven.


The Klutch 4 x 36 belt sander will get me in the ball park as far as removing high spots and providing a good starting point for truing up each side but it won't provide the accuracy I'm looking for. This could be the construction of the belt sander (cheaply made) or it may have to do with the magnet I was using. In any case, I finally had to go back to a manual method and simply complete each finished side by hand.

I decided to make a couple of flat surfaces for sanding by hand, I'll call them sanding tables. I purchased 2 x 2 x 36 inch square block and a 1/2 x 6 x 48 flat block. Each piece is oak and it is milled flat (supposedly). It should be noted that this is not the bulk lumber one can purchase for building, outdoor work, etc. I cut the 2 x 2 piece into thirds and I cut 2 of the 1/2 x 6 into 14 inch lengths. Then I took simple wood glue and clamped the pieces together. The result provided me with a portable surface that I could stick a bit of sandpaper to with spray adhesive. I can also clamp this sanding table into my bench vise, very handy.

Using the 60 grit sandpaper and my strong magnet, I can now grind each blade side true flat and parallel to the other side. This part of the process can be labor-intensive and time-consuming depending on how much sanding is needed to clean up a side flat. Because I used my 4 x 36 belt sander first, each blade finished up fairly quickly, but there were two blades that took nearly 20 minutes of sanding to clean up.


From the photo, one might be able to see the "divot" in the middle of the blade. I'm not too concerned for any low spots along the handle unless it's at the edge. The handle will receive scales to cover it anyway. Here I'm using 60 grit sandpaper glued to one of my sanding tables I made.


Here I've used a large permanent marker on part of the blade to identify the low spots. After a bit more sanding, part of the low spot is still visible because it's been stained by the permanent marker. This gives me a very helpful visual reference to go by when trying to determine if I've clean up any low spots.


I've also needed to make a modification to the Grizzly. The platen that the Grizzly came with had to be adjusted. Note the following photo.

Retrieved from mickleyknives.com


The flat plate that sits vertical between the two wheels is called the platen. A platen is a flat section of a sander where the belt will ride upon. The flat section provides a backing to allow a technician to press a work piece into the belt as it's running - thus grinding away material. The original platen on the Grizzly had a graphite imbued tape, almost like double-sided duct tape pressed on the platen. This had to be removed before I could put any grind on the knives.


The platen after a good bit of time on a belt sander at the school where I work. It has a motor with much more horsepower than my consumer grade belt sander.


I decided to try and use a bit of ceramic tile for a platen. I've seen this done before on other machines and some folks have even made videos and posted them on Youtube for demonstration. The only problem was I didn't know how I was going to cut it. I couldn't get the exact size I needed to attach to the platen, so having it cut with any precision at the hardware store was unlikely.


At first, I tried a method offered by Dremmel. This is an attachment that will fit most Dremmels and it was to provide a way to use a small routing bit to cut away sections of the ceramic. And, it's pretty cheap.


Fairly simple setup.


I clamped the tile to a piece of 2 x 4 left over from making my chop saw table.


This is how far the bit made it into the tile before becoming so dull that it wouldn't cut anymore. Oh well. The cheapest method isn't always the best method - in this case it wasn't even a method because it didn't work.


I wasn't planning on purchasing a wet cutting tile saw just yet. I would've needed one eventually to help rough cut G10 material. G10 is a glass epoxy laminate. Basically, take plastic, epoxy resin, and layer each material with glass thrown in, and you've got G10. This material is usually found on terminal boards, electrical equipment, and induction heating machines. Because it's very durable and stable, and because it's available in a variety of colors, it's recently gained popularity among knifemakers as handle scale material. But I've worked with G10 as a machinist and it's not easy to machine. It will quickly dull high-speed-steel tools and to machine it means wearing a dust mask if no coolant is used. Instead of removing material in large chips or shavings, it machines off in a fine dust similar to talcum powder. But, no tile means further delays in my current project, and I've had enough of those already and they're pissing me off.

 It doesn't produce the straightest cut, but it does the job well. I had to purchase rubber coated gloves because the water makes this material very slippery to handle.


I needed to cut a small steel support piece for the tile to rest on.


The finished modified platen, after much swearing and a lot of effort put into cleaning up the excess JB Weld that I went WAY OVERBOARD in using.


The platen after some use. I see no noticeable wear. The ceramic tile seems to be virtually immune to heat damage - with the gloss being the exception.


The shop after a good bit of work.


This has been a pretty busy week in the shop mainly because I've been off work for fall break. The blade sides are now thankfully true flat and parallel. I've also purchased some angle iron as I intend to make a fixture that will allow me to reproduce a flat grind for each blade. After all of this effort, I'm glad I'm making progress again. That will be the topic of my next article. I've got a good idea on how I want it to work and a rough design idea in my head. We'll see how it works!