Sunday, July 29, 2012
The Blackbear First! (Of Hopefully Many!)
Sorry I haven't written any articles lately. One reason is because at our school we were finishing up the summer semester and preparing for graduation. But the main reason is because afterwards, I took a little time off for a knifemaking class! The class was held at Montgomery Community College in Troy, NC. It was a bit of a drive for me to have to commute so I decided to stay in a hotel near Albemarle, about 20 minutes west of Troy. Troy is located in Montgomery County and a large section of the county is federal forest - the Uwharrie National Forest; part of the Uwharrie (Yew-are-ee) Mountains. I've lived there for part of my life in the Uwharrie Mountains (in Randolph County) and despite the heat, it was a pleasure returning. The Uwharrie Mountains have beautiful rolling small mountains, many rivers and lakes, loads of trails, and a lot of other opportunities for the outdoor enthusiast. Unfortunately, I was really busy during my class so I was unable to take much time off and photograph anything during my stay. Oh well, maybe later I'll go back and take some photos for another video slideshow. I'm actually about to leave tomorrow for a short stay up in the Appalachian Mountains for a bit. I sincerely hope that it'll be cooler there than it has been around here. These Southeastern summers are brutal and I don't deal with them very well.
So the class was Intro to Tactical Knifemaking taught by Barry and Phillip Jones of Jones Knives. The two brothers have more than 20+ years experience making knives. There were eight people in the class. Most were from NC but at least 2 came from Chattanooga, TN. The instructors were very knowledgeable and helpful.
The first day we started right off cutting the material and shaping the overall knife. The second day was spent mostly putting the grind on our blades and preparing them for heat-treating. We started working on the handle scales on the third day and finished up the fourth day on our knife edges. I think that the most challenging part about this process was putting the grind on the blade. I kept messing up the grind at first but practice and a little patience improved my technique. The next day I was able to finish up the grind and catch up with the rest of the class. I wished that I had taken my camera for some pictures of the process. A fellow student was doing that and he said that once he gets them edited that he'll send me some. Hopefully I'll get those soon.
Anyway, here it is! The first ever completed knife I've made. The blade is made of 440C 2" x 5/32" stainless steel and it is a full tang knife. Note that this is not the design I had been working on in my shop prior to the class. The overall length is 7-1/2 inches and the blade is 3-1/4 inches. Because of the integral blade guard, the handle just barely allows for a full grip of my sized hands. The design is Barry Jones' (I think). Even though we were supposed to make tactical knives (which I don't really care much for), I envisioned a small game skinning knife with this design. We heat-treated the blades first at around 1880 degrees Fahrenheit. They were then air quenched (basically left to cool on their own) and then we tempered them at about 350 degrees. My blade was one of few that actually came out of the furnace from the first heating in a pretty good state. Its appearance on the blade didn't change very much at all. The handle scales are black linen micarta. And the pins are brass. Some of the imperfections in the blade have been left because I want to make sure I learn from those mistakes I've made. Still, overall I had a good time and I learned a lot. Not bad for a first completed attempt! Not sure what I should name it yet. Any suggestions?
Friday, July 6, 2012
The Amateur Crafter: 3.0: First Design – Continued
Let’s grind some metal!
After rough cutting the profile it’s time to finish it up smooth so that I can get a “feel” for how it fits in the hand without scales. First I used a 60 grit 2 x 72 belt. The photo shows the distinctive orange color that the Norton Blaze belts are known for. It was pretty easy, with one exception. The finger choil area.
The smaller 1 x 30 belt sander. Although this sander seems to be really cheap, it did do a good job of roughing out some of the portaband saw cuts. However, I didn’t have a way to get into the finger choil area without taking more material off than needed along the lower part of the handle. I will also have to modify this belt sander as I could really use the rounded section of belt around the upper wheel. This would be useful for getting into curved areas that the Grizzly cannot reach but it also means removing a safety feature for the sander, in this case – a guard.
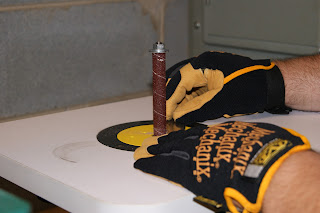
I tried switching to my Grizzly oscillating drum sander. This method could be much easier, but the heaviest grit I had available was 180.Not enough to really make a difference in finishing up the handle tang. I would need either a heavier grit drum or a different method.
Here one can see that I’ve mounted the template between some 2 x 4 pieces leftover from my Wen 10” Sliding Compound Mitre Saw table. The wood blocks allow me to use the vise to hold the blank without marring the surface. This allowed me to access the finger choil area and the rest of the bottom of the handle with a half-round bastard file. Not the easiest method, but it gave me a lot of control over the material removal process. Plus there were some “high spots” along the lower handle area from grinding where the belt couldn’t reach. This took longer than expected but the final result was a smooth finger choil area and a smooth lower handle section. I’ll post in a later article how I finished this with a method called draw-filing.
The file I used to finish up the handle area. It produced a bit of a rough texture but with the smaller jeweler’s file similar to this one I was able to improve the finish.
The final template. I’ve since drilled a hole at the end corner of the handle for hanging on pegboard. This may turn out to be the same location for a lanyard hole. We’ll see. I didn’t want to add pin holes just yet as I may decide to use a different size pin in the future or I may even decide to use screw construction to mount the scales instead of pins. We’ll see.
The template and how it fits in my hand. The actual blade will probably include some jimping along the spine of the blade near the handle for greater control. Also, the blade will be 5/32" thick as opposed to the template which is 3/32" thick.
So what have I learned so far? Well, I’ve learned that despite the headache the Grizzly belt sander gave me, it works great. I especially love the Norton Blaze 60 grit 2 x 72 sanding belts. Those belts cut right through my 1095 steel like butter. I’ve learned to give a bit of extra material for those belts. Believe me, they won’t have any problems cutting extra material down. For future reference, I’ll remind myself to allow the belt to do most of the work for me and not try so much at cutting the blank as close as possible to the design with the portaband saw. I’ve also realized that in order to reach the gully of the finger choil, I will probably need to invest into more abrasive grit belts for the 1 x 30 as well as more abrasive sanding drums. There’s nothing wrong with switching over to a more time-honored method of material removal like hand filing, but if I wish to complete the profiling of the blades in a shorter amount of time, it would pay to have power tools and accessories that can help me accomplish this. Looks like I get to go shopping for more shop stuff!
Up next – a short production run!
Subscribe to:
Posts (Atom)